Storm Shelter Concrete Pad Guide for Alabama Homes

Why a Storm Shelter Concrete Pad is Essential for Alabama Homes
When severe storms hit Alabama, preparation often determines whether a family stays safe. One critical but frequently overlooked element is the storm shelter concrete pad. Even the most robust shelter can shift, settle, or crack if it is not supported by a properly designed, reinforced slab. A good pad reduces risk, increases longevity, and gives you peace of mind.
This guide explains why a reinforced concrete pad for storm shelter is more than a floor: it is a structural component that supports the shelter during high winds, heavy rain, and soil movement. You will also find step by step instructions for preparation, pouring, curing, and inspection so your shelter performs as expected during extreme weather.
Understanding the Importance of a Strong Storm Shelter Concrete Pad
A well-constructed pad:
- Reduces the risk of shifting or sinking during heavy rainfall
- Improves the structural integrity of the shelter during tornadoes and storms
- Provides a level surface for installation and safe interior use
- Minimizes long term maintenance and repair costs
Not all slabs are created equal. Thickness, reinforcement, subbase preparation, and curing practices all affect performance. Skimping on any of these could increase storm shelter construction problems or lead to premature deterioration.
Step-by-Step Guide to Building a Concrete Pad for Storm Shelter Stability
Below is a practical sequence to build a durable pad that supports residential, community, or commercial shelters.
Step 1: Selecting the Ideal Location for Your Shelter Base
Purpose: Location dictates drainage, accessibility, and long term stability.
Instructions:
- Choose flat, well drained ground away from low spots or flood prone areas.
- Avoid locations near large trees or steep slopes that could undermine soil stability.
- Consider access for maintenance and emergency egress.
- Mark the pad perimeter with stakes and string for the exact dimensions.
Pro Tip: If possible, get a simple soil compaction or bearing test to confirm the ground can support a reinforced concrete slab without excessive settling.
Step 2: Preparing the Ground Before Pouring Concrete
Purpose: Proper preparation prevents uneven settling and cracking.
Instructions:
- Excavate to the planned slab depth, typically 6 to 8 inches below finished grade for many residential shelters; larger or commercial pads may require more depth.
- Clear roots, organic material, and debris to create a uniform base.
- Compact the soil using a plate compactor for a stable subgrade.
- Add a 2 to 3 inch layer of compacted gravel or crushed stone to improve drainage beneath the slab.
- Slope the surrounding grade slightly away from the slab to divert surface water.
Pro Tip: For in ground storm shelter installations, take extra care with drainage around the perimeter to avoid hydrostatic pressure against the shelter.
Step 3: Installing Reinforcement for Maximum Durability
Purpose: Reinforcement prevents cracking and increases load capacity.
Instructions:
- Use rebar in a grid pattern, typically spaced 12 to 18 inches on center for residential pads; adjust spacing for larger loads.
- Elevate rebar on chairs or small concrete blocks so reinforcement sits in the middle of the slab thickness rather than on the bottom.
- Tie intersections with wire to preserve grid stability during the pour.
- Consider additional continuous rebar at slab edges and corners where stresses concentrate.
Pro Tip: For small pads, welded wire mesh can be effective, but heavier shelters usually require full rebar reinforcement.
Step 4: Mixing and Pouring the Concrete Properly
Purpose: Correct mix and placement ensure long term strength.
Instructions:
- Use a high strength concrete mix, minimum 4,000 psi for shelter pads in most climates.
- Pour evenly starting from one corner and work across the form to avoid cold joints.
- Use a screed board to level and consolidate the concrete, removing air pockets.
- Finish the surface with a trowel to create a uniform thickness, typically 6 to 8 inches for many storm shelters; larger shelters may need thicker slabs.
- Avoid pouring in extreme heat or cold without proper temperature control measures.
Pro Tip: For very large pads or commercial storm shelters, plan your pour in stages with adequate jointing to control shrinkage cracks.
Step 5: Curing and Protecting the Concrete Pad
Purpose: Proper curing maximizes strength and reduces cracking.
Instructions:
- Cover the slab with a curing compound, wet burlap, or plastic sheeting to retain moisture.
- Keep the slab damp for at least 7 days; longer curing, up to 14 days, increases long term strength.
- Protect the slab from foot traffic and heavy loads during curing.
- Repair any minor surface cracks immediately to prevent water infiltration.
Pro Tip: In Alabama’s warm climate, mist the slab periodically to prevent rapid drying that causes shrinkage cracks.
Step 6: Inspecting and Finalizing the Shelter Installation
Purpose: Confirm the pad meets installation and safety requirements.
Instructions:
- Check levelness with a spirit level or laser level across multiple points.
- Confirm pad dimensions match the shelter base and any anchor locations.
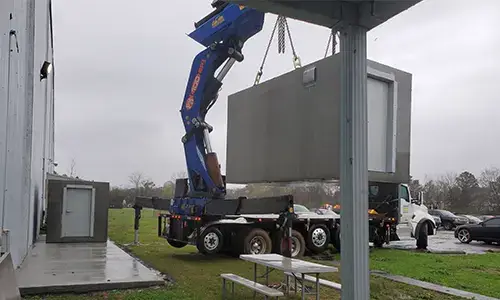
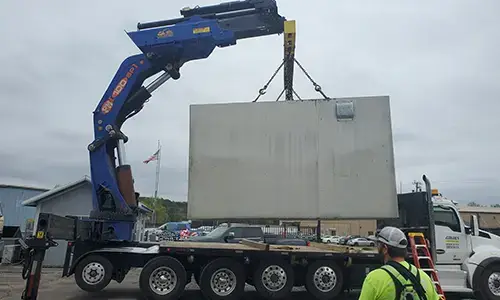
- Install shelter per manufacturer specifications, anchoring to the pad where required.
- Conduct a final inspection of edges, reinforcement exposure, and surface finish.
- If unsure, schedule a structural inspection from a qualified professional to verify slab adequacy.
Pro Tip: For added security, embed anchor bolts into the pad at known manufacturer anchor points so the shelter is positively secured to the concrete.
Practical Applications of a Storm Shelter Concrete Pad
Concrete pads support many shelter use cases:
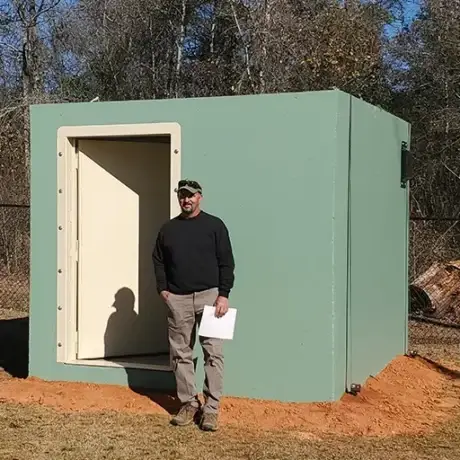
- Residential tornado shelters benefit from a reinforced pad that resists uplift and lateral movement during EF2 or EF3 events.
- Community shelters and schools require larger, thicker pads to support multiple units and heavy occupancy.
- Anchored systems can be cast with embedded bolts so shelters remain fixed even under extreme lateral forces.
Owners installing concrete storm shelters should plan for load distribution, anchor locations, and long term drainage to maximize shelter performance.
Tips, Best Practices, and Common Mistakes for Concrete Pads
Avoid these common errors and follow industry best practices:
- Do not undersize thickness: A pad thinner than 6 inches often cracks under shelter loads.
- Do not skip reinforcement: Lack of rebar or wire mesh reduces slab resilience.
- Do not rush curing: Rapid drying increases shrinkage cracks and weakens the slab.
- Do not ignore poor soils: Soft or organic soils require compaction or geotech solutions.
- Inspect annually: Check for small cracks, erosion, and edge deterioration and repair promptly.
These practices reduce long term issues and lower total concrete storm shelter cost by avoiding future repairs.
Ensuring a Safe and Durable Storm Shelter Concrete Pad
A well designed concrete pad improves the safety and longevity of your shelter. Proper site selection, subbase compaction, reinforcement placement, careful pouring, and disciplined curing ensure the slab performs when you need it most. Whether you plan an above ground safe room or an in ground storm shelter, invest in the pad as a primary safety element.
For product options and shelter types, consider manufacturer pages that describe different installations such as safe rooms, above ground shelters, and underground shelters. If you prefer an unpainted finish for an above ground unit, see the unpainted concrete above ground shelter options. Community planners can review community shelter solutions, and homeowners in Alabama may find local case studies on the in ground installation page for in ground storm shelter Alabama.
If you are researching construction trends or high level cost factors related to shelter projects, reputable business coverage such as Forbes can provide broader industry context into construction pricing and material trends.
Frequently Asked Questions About Storm Shelter Concrete Pads
1. How thick should a concrete pad for a storm shelter be?
Most residential storm shelters require a minimum thickness of 6 to 8 inches. Larger or commercial shelters may need thicker slabs based on weight and occupancy.
2. Can I pour a concrete pad myself for a storm shelter?
Yes. Many homeowners can perform a DIY pour if they have the right equipment and follow reinforcement and curing best practices. For heavy, buried, or community shelters, professional installation is recommended.
3. What type of concrete mix is best for storm shelter pads?
Use a high strength mix, typically 4,000 psi or greater, to ensure weather resistance and long term durability.
4. Do I need reinforcement for a small shelter pad?
Yes. Rebar or welded wire mesh greatly improves crack resistance and structural integrity even for small pads.
5. How long should I cure the concrete pad?
Cure for at least 7 days while keeping the slab moist. Extending curing to 14 days increases strength and durability.
Cost Considerations and Related Pricing Topics
While this guide focuses on construction steps, many homeowners also ask about concrete storm shelter cost, storm shelter prices, and storm shelter installation cost. Costs vary by shelter size, pad thickness, site conditions, and labor. Factors such as excavation depth, soil remediation, and embedded anchor systems increase project scope and price. For a clear idea of local pricing, get multiple quotes that separate pad cost from shelter unit cost so you can compare concrete storm shelters prices and underground storm shelter cost estimates accurately.
Final Note: Build the Base First, Safety Follows
Investing time and resources into a properly designed storm shelter concrete pad is an investment in safety. A well prepared pad reduces the chance of shelter movement, cracking, and failure during severe Alabama storms. Whether your goal is a simple residential safe room, an in ground shelter, or a community refuge, build the base right and the shelter will perform when you need it most.